A guest post by Tim Reynolds.
Most writers I know are on a limited budget for advertising and promotion, especially the self-published ones. Even the writers with traditional publishers may have to foot the bill for some or all promotional supplies.
I, myself, am both self-published (4 books) and traditionally published. When I’ve done book signings in the past I had some nicely done 8×10 covers in frames on the table, with teasers about the book and even reviews. It looked well and good and…cheesy. At multiple-author events, the authors who got the most attention (and often the most sales) had a LARGE presence in the form of a banner.
Banners are great for signings, readings, and trade shows. The problem is that many authors have multiple books they need to promote, though seldom all at the same time. They might have a signing for their YA novel tomorrow, then a reading for their sci-fi opus on Sunday, and have a table set up at World Fantasy Convention next week. You want your banner to promote your product, but that’s three products, which makes for three banners. Banners aren’t cheap. The stands can be reused, but a banner for each book gets prohibitively expensive.
My solution? An adaptable, multi-use banner.
STEP ONE: Design a banner that covers as many of your bases as possible, without using any specific titles. This is the hardest step. Many of you will want to get your banner professionally designed. I have a background in graphics, so I did my own.
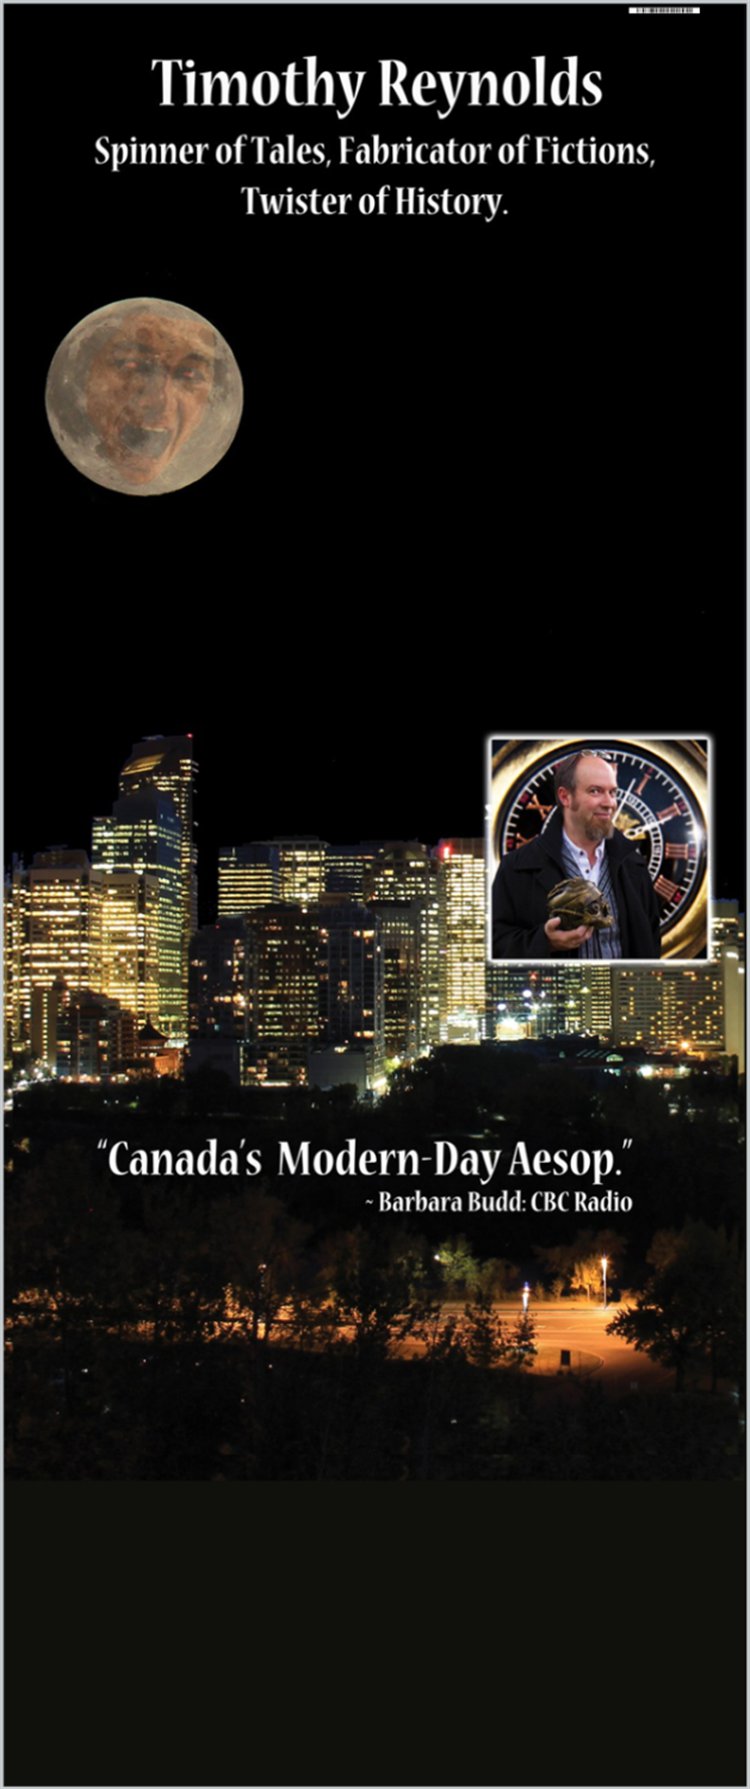
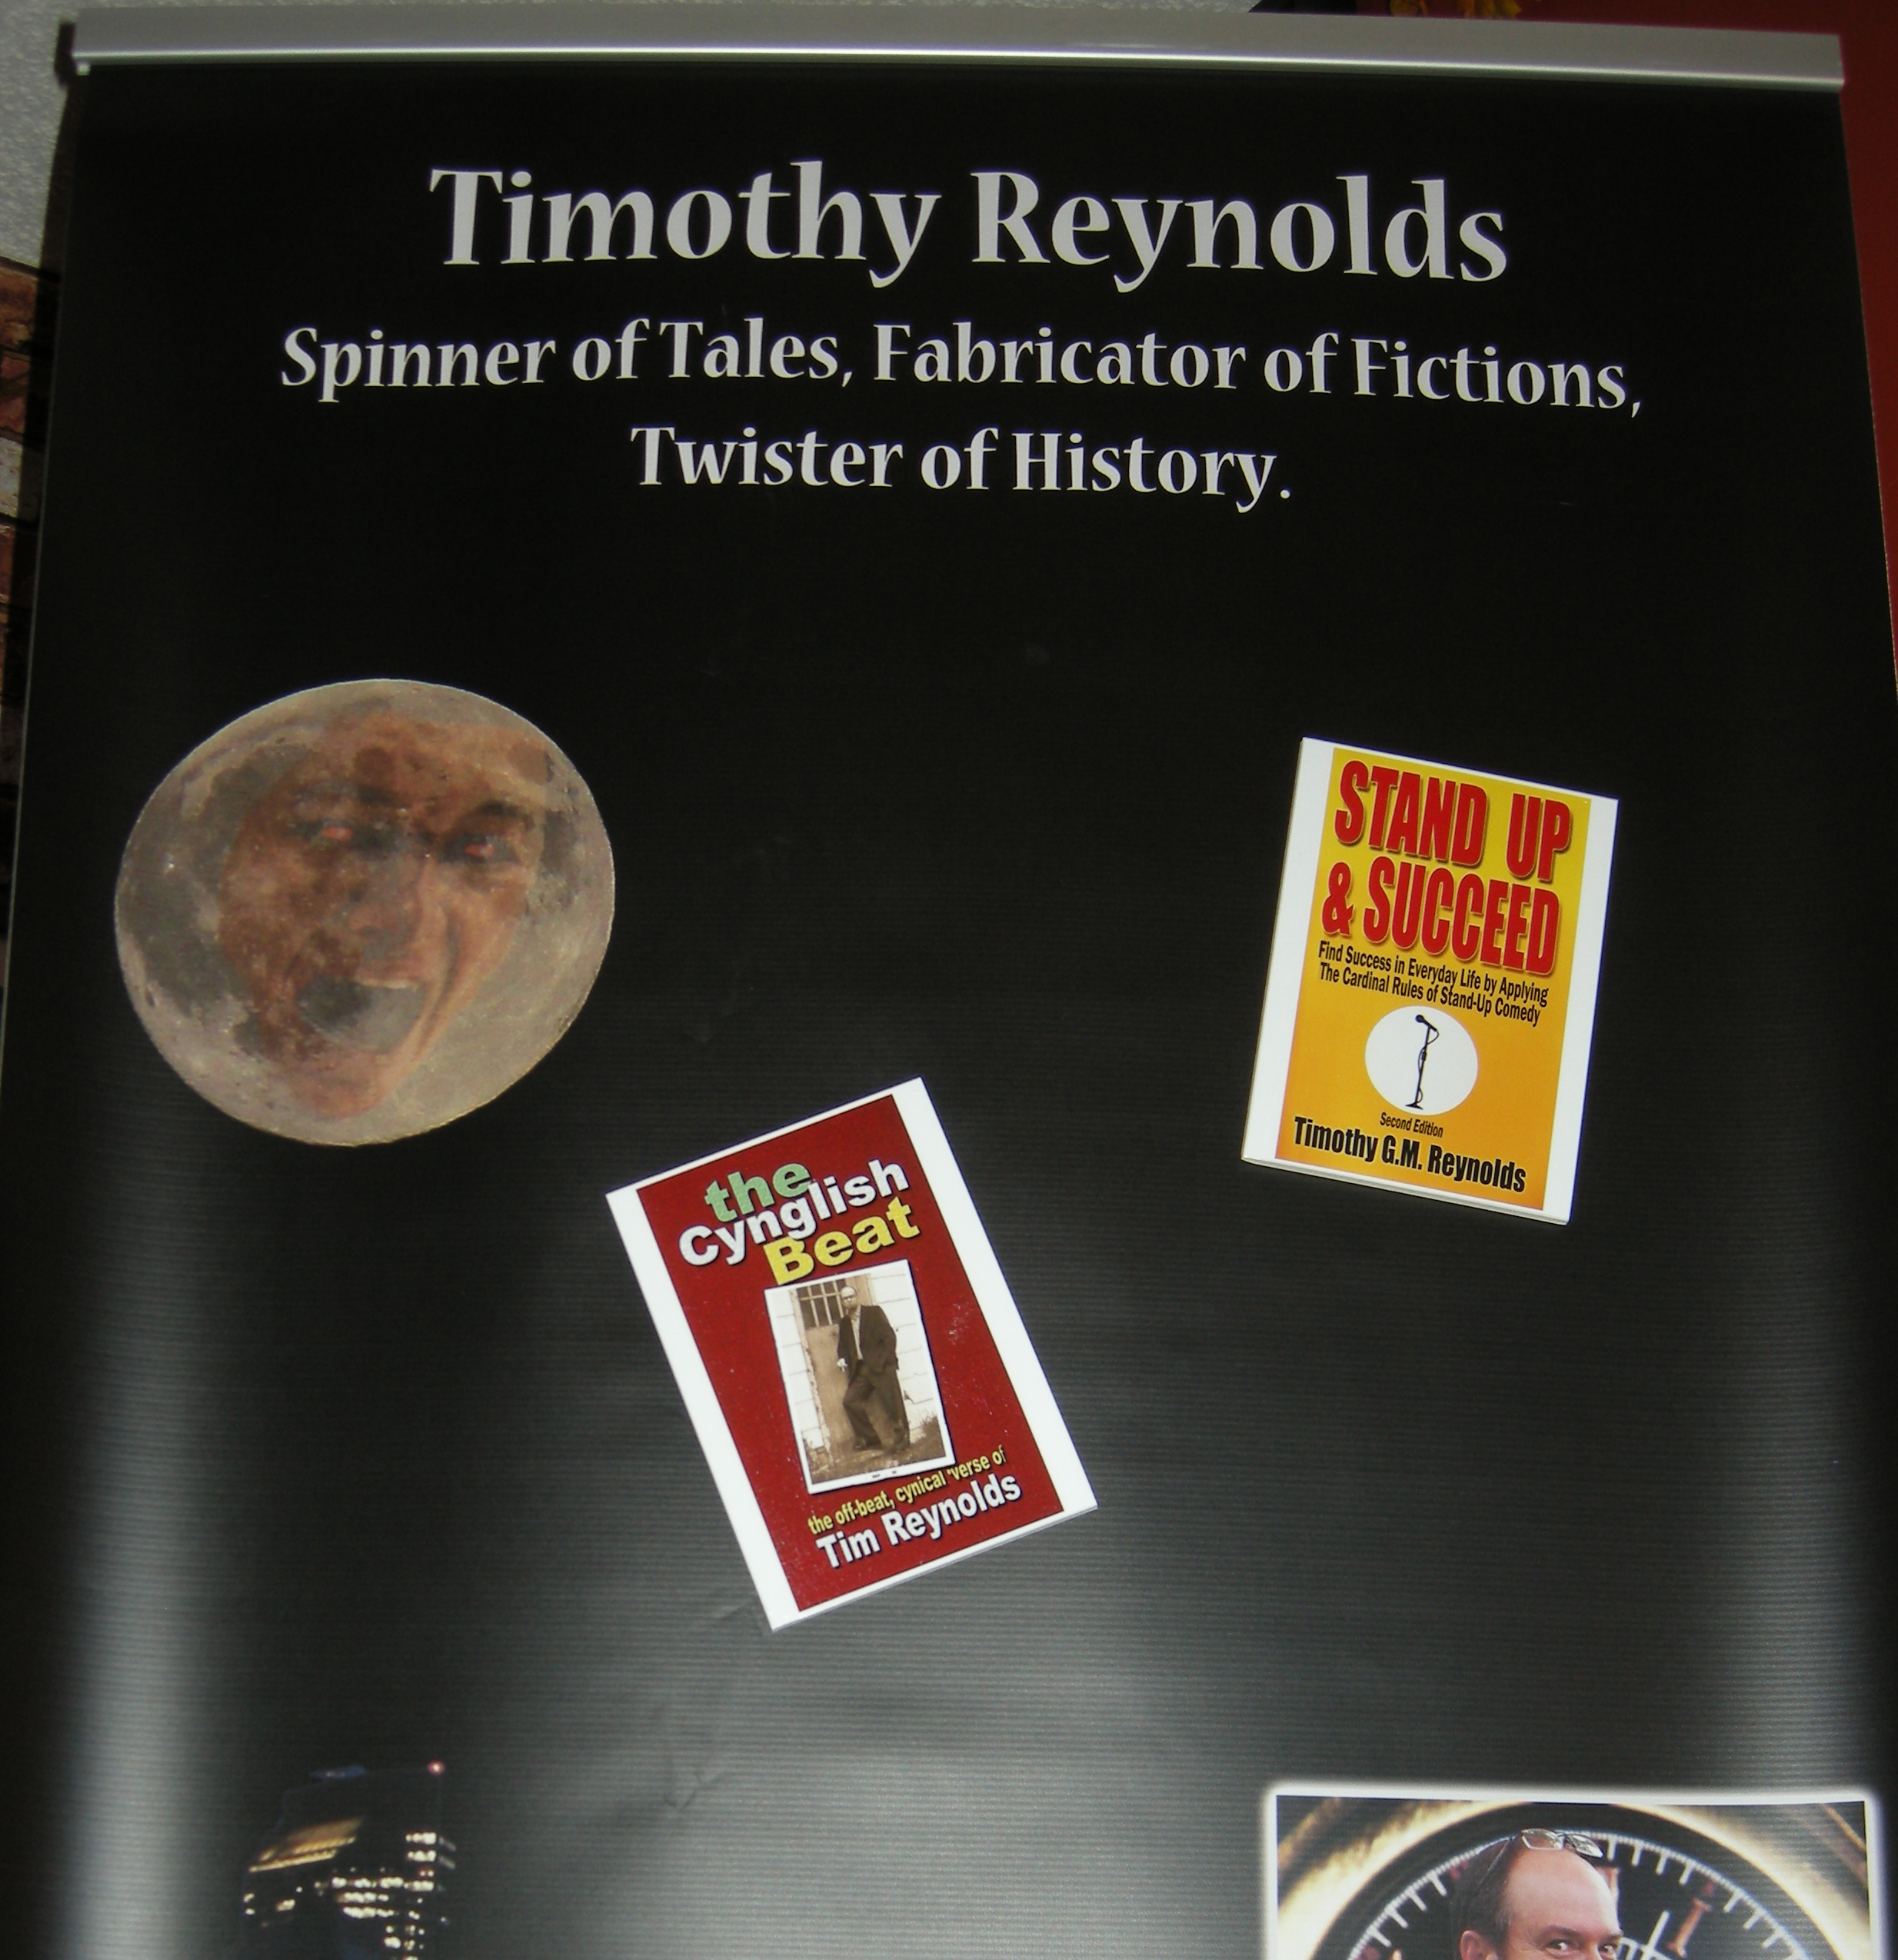
Here’s mine. It’s 30″ x 72″. I’ve cropped off the bottom because it’s not important right now. If you can’t read what it says, here it is:
“Timothy Reynolds. Spinner of Tales, Fabricator of Fictions, Twister of History. ‘Canada’s Modern-Day Aesop’ ~ Barbara Budd, CBC Radio.”
That’s my name, a catchy/cute way of saying what I do, and the best promo quote I have. It also has my author photo, a moon with a bloody screaming face, and a generic city scape at night…to add atmosphere. Much of what I write has a dark element to it, so this is not a light and fluffy smiles-and-puppies banner.
There’s no publisher name at all. Not even my own company. Why? Because if I put Cometcatcher Press on it, then I can’t use it when I’m promoting “When Anastasia Laughs”, which will be published by Tyche Books in 2016, or “Tesseracts Seventeen” from Edge Science Fiction & Fantasy Publishing, which contains my short story “Why Pete?”.
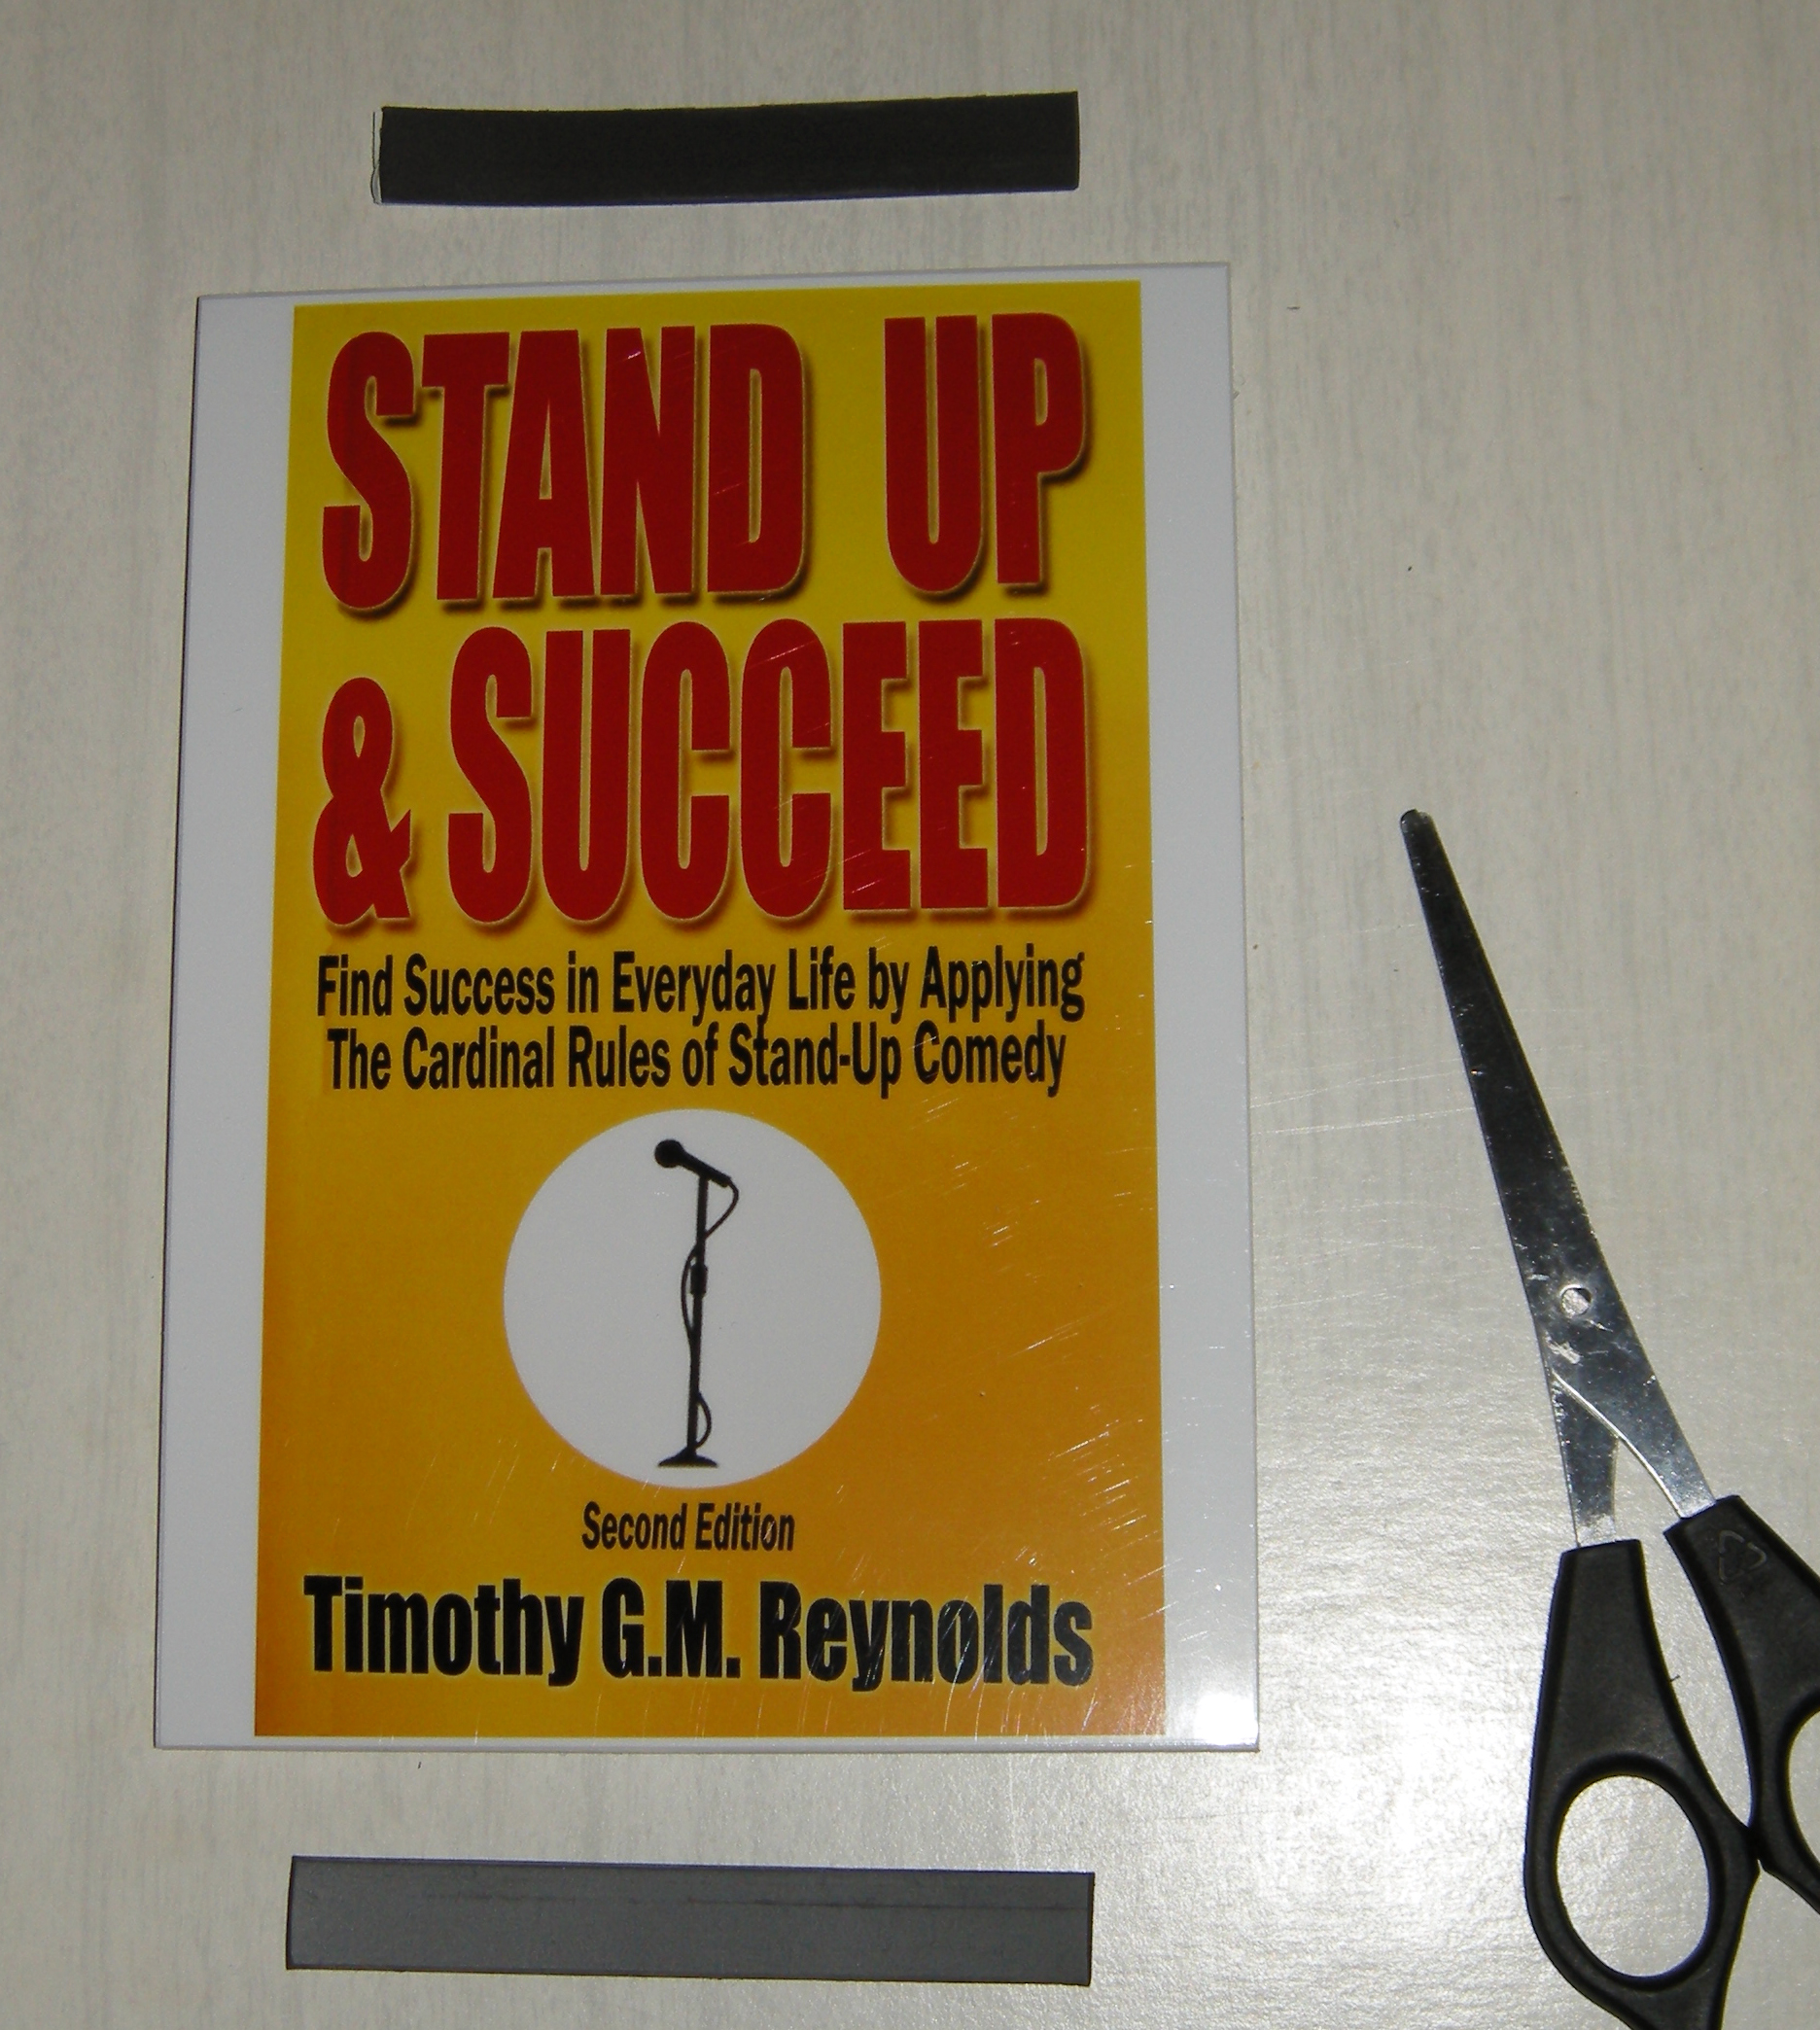
STEP TWO: Have your cover(s) reproduced as photographs, mounted on foam core and laminated for protection. Almost every film lab can do this for you. I use Western Canada’s best: London Drugs.
I had all four covers done as 5x7s. Why? Because 5x7s are lighter than 8x10s and will remain in place better.

STEP THREE: You will need magnetic tape. It’s available at Michael’s Arts & Crafts and 10′ costs less than $5. Cuttwo 5″ strips for each cover. Because the strips will maintain their shape from when they were on the roll, take the strips and place them on a flat surface, under a heavy weight, overnight. Once they are flat, they are ready to use.
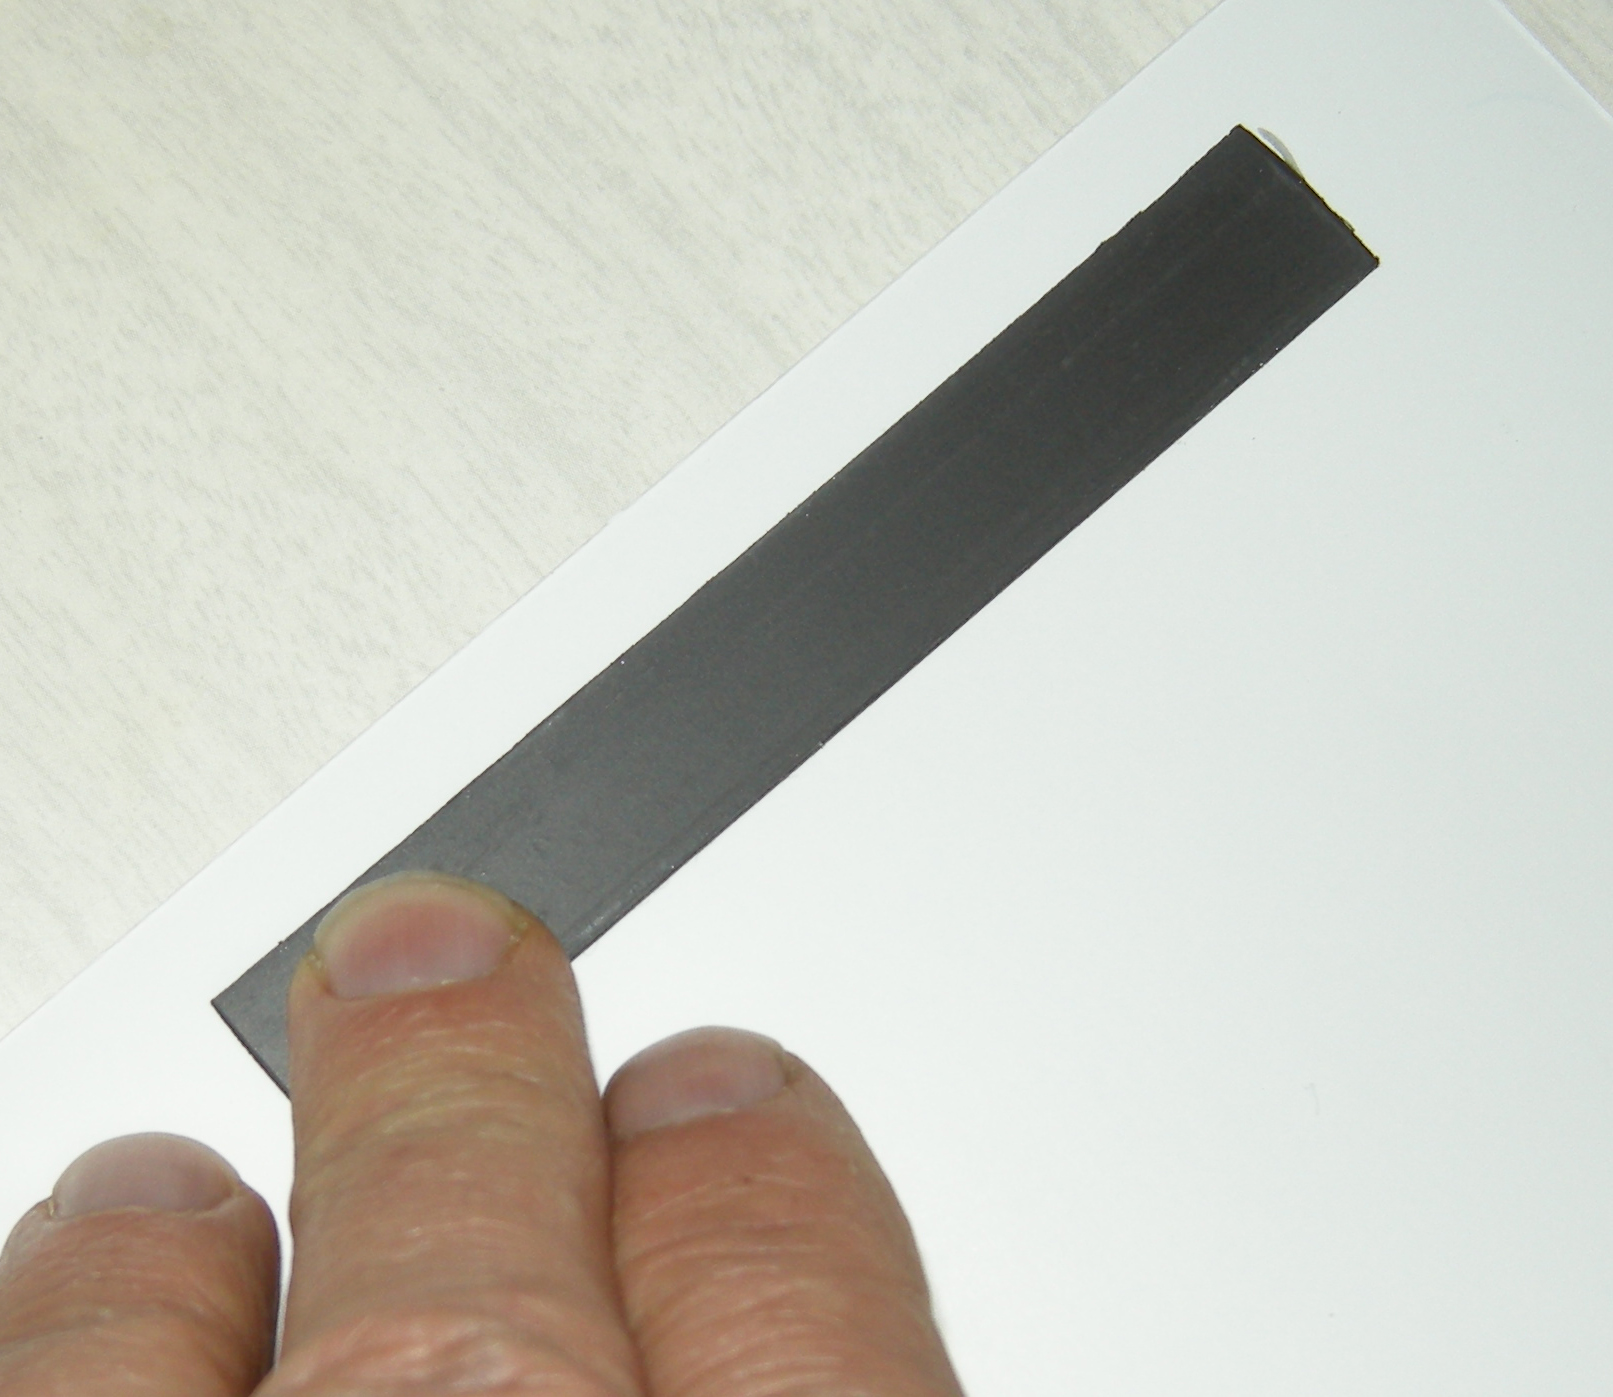
STEP FOUR: Working on a clean surface, place a cover face down. Peel the backing off of the magnetic tape, and place two strips firmly on the back of the cover, centred left-to-right and down a bit from the top.
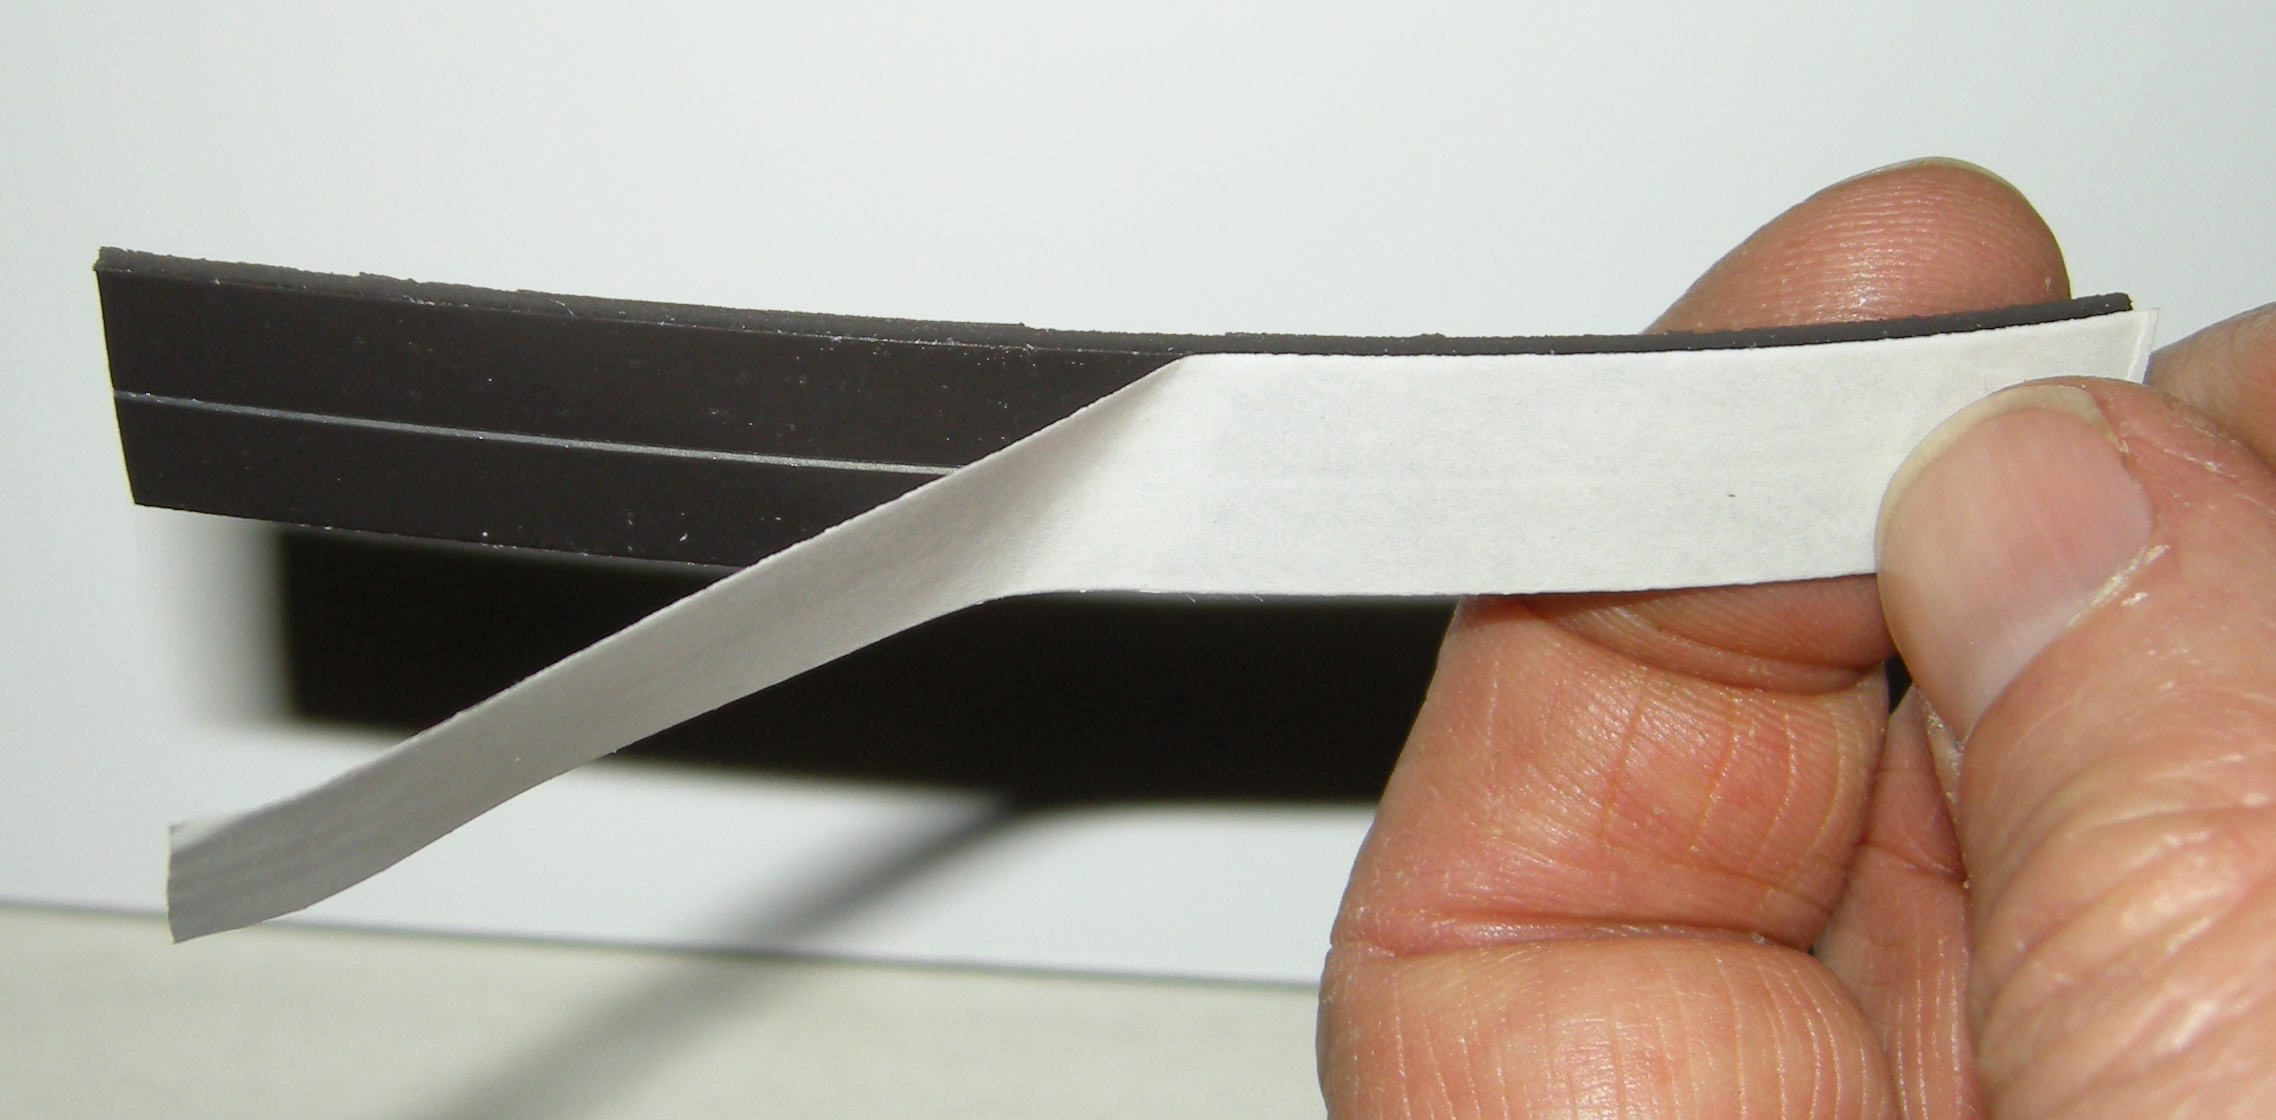
Place the magnetic tape on the back of the cover. Press firmly.
STEP FIVE: While the banner is hanging, place the cover where you want it to be, then place the second magnetic strip on the back of the banner, directly opposite the strip on the cover.
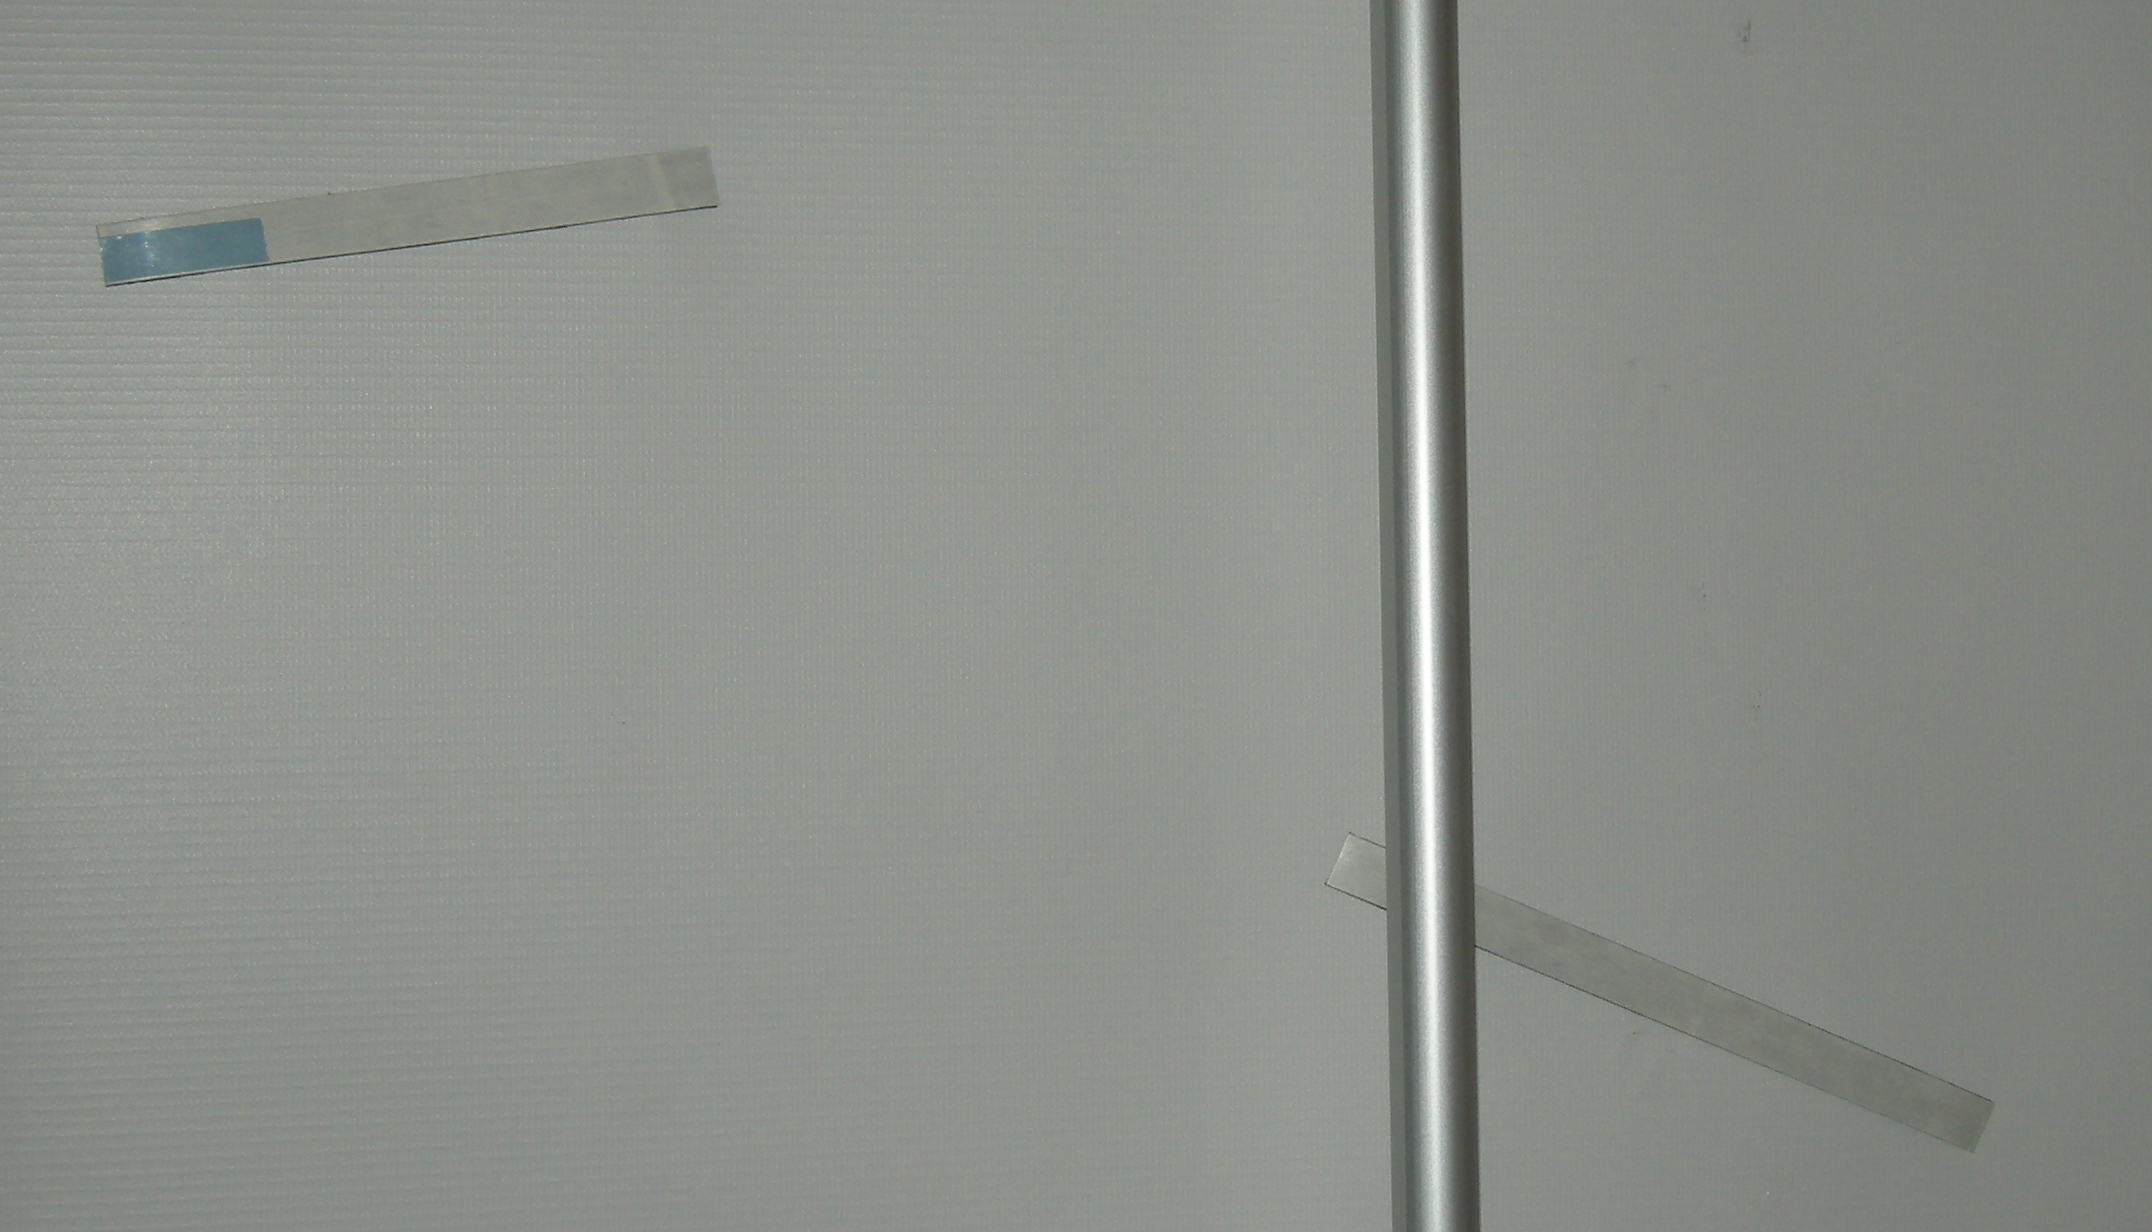
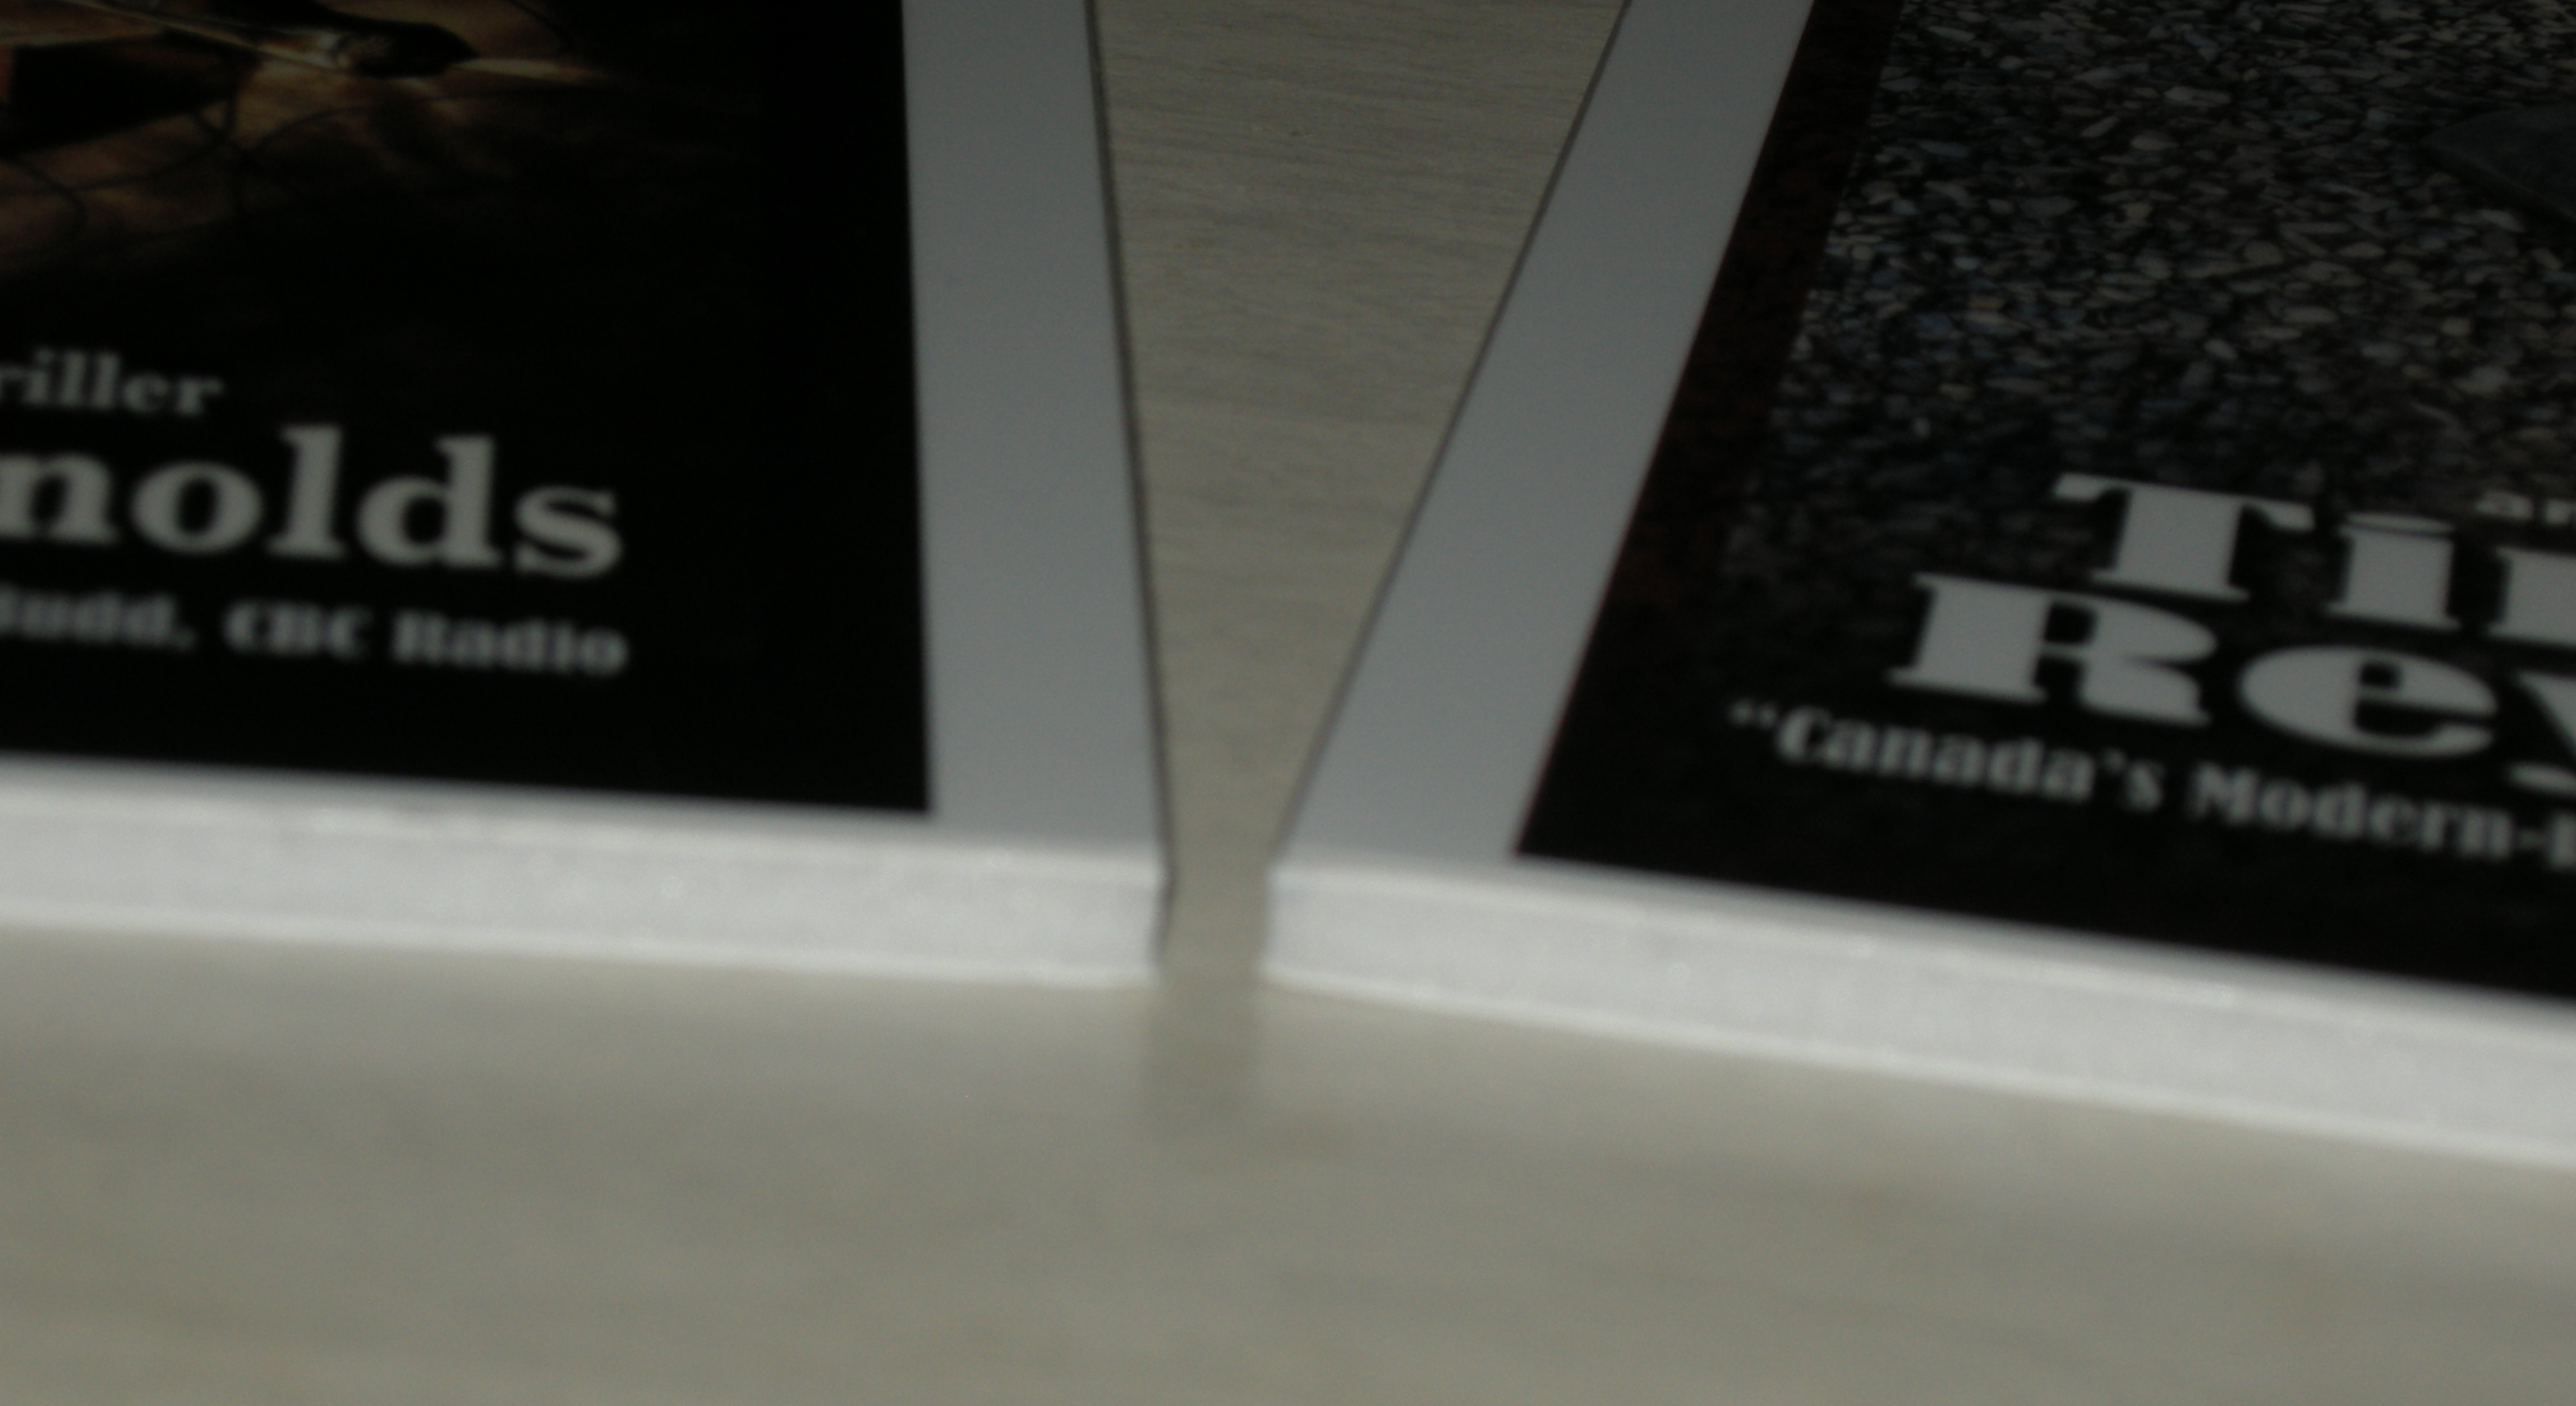
When it’s all done, you have a banner with one (or in this case, two) covers on display. You can do the same with the publisher’s logo and even a sign with the times you will be present. Other possibilities include: “Coming Soon”, “New York Times Bestseller”, or whatever your heart desires. Reviews, quotes, anything. All I suggest is to not overload the banner.
The foam core is very light weight, as is the magnetic tape. I had considered using adhesive Velcro, but then the banner couldn’t be rolled up smoothly. This method with the magnets allows complete removal of the artwork and for the banner to be rolled and stored indefinitely without damage being done to its surface or shape. For a stronger attachment, put magnetic tape near the bottom of the cover as well.
(NOTE: I’m still not sold on the white borders I put on the covers, but with a sharp blade I can remove them easily.)
STEP SIX: Get yourself a 6×8 Rubbermaid lunch box for storing the covers, a hard plastic tube for the banner, and you’re all set for your next signing.
MATERIALS: Magnetic Tape: $5. Banner on heavy outdoor vinyl: $63 &Stand (includes carrying bag): $40 (both from Vistaprint), Plastic banner tube $21 from a local Digital Post store. BTW, VistaPrint is always having sales, so set up an account, do the design work, and wait. They will send you an email shortly with the latest sale. You can save anywhere from $10 to 33% of your entire order. Their online design & preview kicks ass, too.
Note: in some of the photos above you can see what look like creases on the banner. It was damaged in shipping. I called VistaPrint and explained the situation. Without seeing photos or getting witness statements, they immediately ordered a new one and it was shipped out the next day. It arrived in three days. Their customer service is second-to-none.
I hope this gives you some ideas and inspires you to get out there and promote your writing with a professional presence. Other things to help are bookmarks with the cover, where to buy it, and your website URL. If you don’t have your own website…GET ONE!
That’s it, that’s all.
Ciao for now,
Tim.
 Tim Reynolds is a Canadian ‘Twistorian’, bending and twisting history into fictional shapes for fun & entertainment.
His debut novel, the urban fantasy, The Broken Shield, was released on July 21, 2014 on Amazon as a digital book and in March 2015 in paperback form. It covers over 2000 years of history and shows that even Lucifer knows “there’s an app for that”. His published short stories range from lighthearted fantasy to turn-on-the-damned-lights-now horror. His 100-word story “Temper Temper” was a winner of Kobo Writing Life’s Jeffrey Archer Short Story Challenge. In 2016 watch for his novel “When Anastasia Laughs” from Tyche Books.
He can be found online at www.tgmreynolds.com or @TGMReynolds on Twitter.