Tag Archives: Tools

Orbit Xplorer

A guest post by Doug Dandridge.

I was going to write a post about Ginger, a software program that helps writers find errors in their manuscripts.  However, Ginger changed their interface to the point where it does not do all the stuff this writer was going to rave about.  So on to something else.

I write very detailed military science fiction, and I like to get things right as much as I can.  I’m sure I miss, but not from a lack of trying.  In the bad old days, I had to do everything by calculator and graph paper, but now the internet supplies the tools to really get down into the dirt of astrophysics.  There are a lot of programs out there that do a good job of simulating different types of orbital systems.  Programs like Universe Sandbox and others.  I love Universe Sandbox for simulating where asteroids are going to be at any given time in the future.  For detailed orbits of simpler systems, enter Orbit Xplorer by Ottisoft.  At $25 for a single site license the program, for all it can do, is a bargain.

OrbitXplorer

Orbit Xplorer comes with a number of preprogramed simulations, a star visits the sun (bad), double star (cool), Kepler’s laws (educational), two colliding stars (also really bad, but cool as well).  While useful, I found the simulations I could program to be much more useful, and I will give three examples below.

I wanted to work out Hohmann Transfer Orbits for a book idea about Mars.  Hohmann’s use a least fuel curving orbit to put a ship into Mars orbit from Earth, and can only be accomplished over certain timespans.  But for the book I wanted to see how much of a boost I could use to take days off of the transfer.  Using the program and trial and error I found the optimal boost to achieve a least time transfer, and discovered that any boost after that just sent the ship flying out into the outer solar system.

The second example was working out the orbits for a book that was to be the lead volume for the second Deep Dark Well trilogy (which has been written but not published).  The idea was that ancient humans had moved stars and planets into place, then put terraformed moons into orbit around some of the closer gas giants.  The program allows the user to put whatever objects he wants in orbit around each other, setting the mass of each body as well the distances of the orbits.  Again, it’s a trial and error process, and at some close distances the moons fall into the gas giant.  I set up a situation where all of the terraformed moons were as close as I could put them, so that their days (which are the same as one orbit around the gas giant) would be of reasonable lengths, none more than fifty some hours or so.  When I ran the program, everything orbited well for about fifty evolutions, as which point one moon curved in, hit another moon, and both collided with the gas giant (very bad), while one of the remaining moons was pulled out of orbit to go careening through the outer solar system, there to freeze (bad as well).  Oops.  Eventually I got it to run a thousand cycles without a disaster, and went with those orbits, which gave me the day night cycle of the moon of interest to the story, as well as the cycle at which phases of the other moons would be seen.

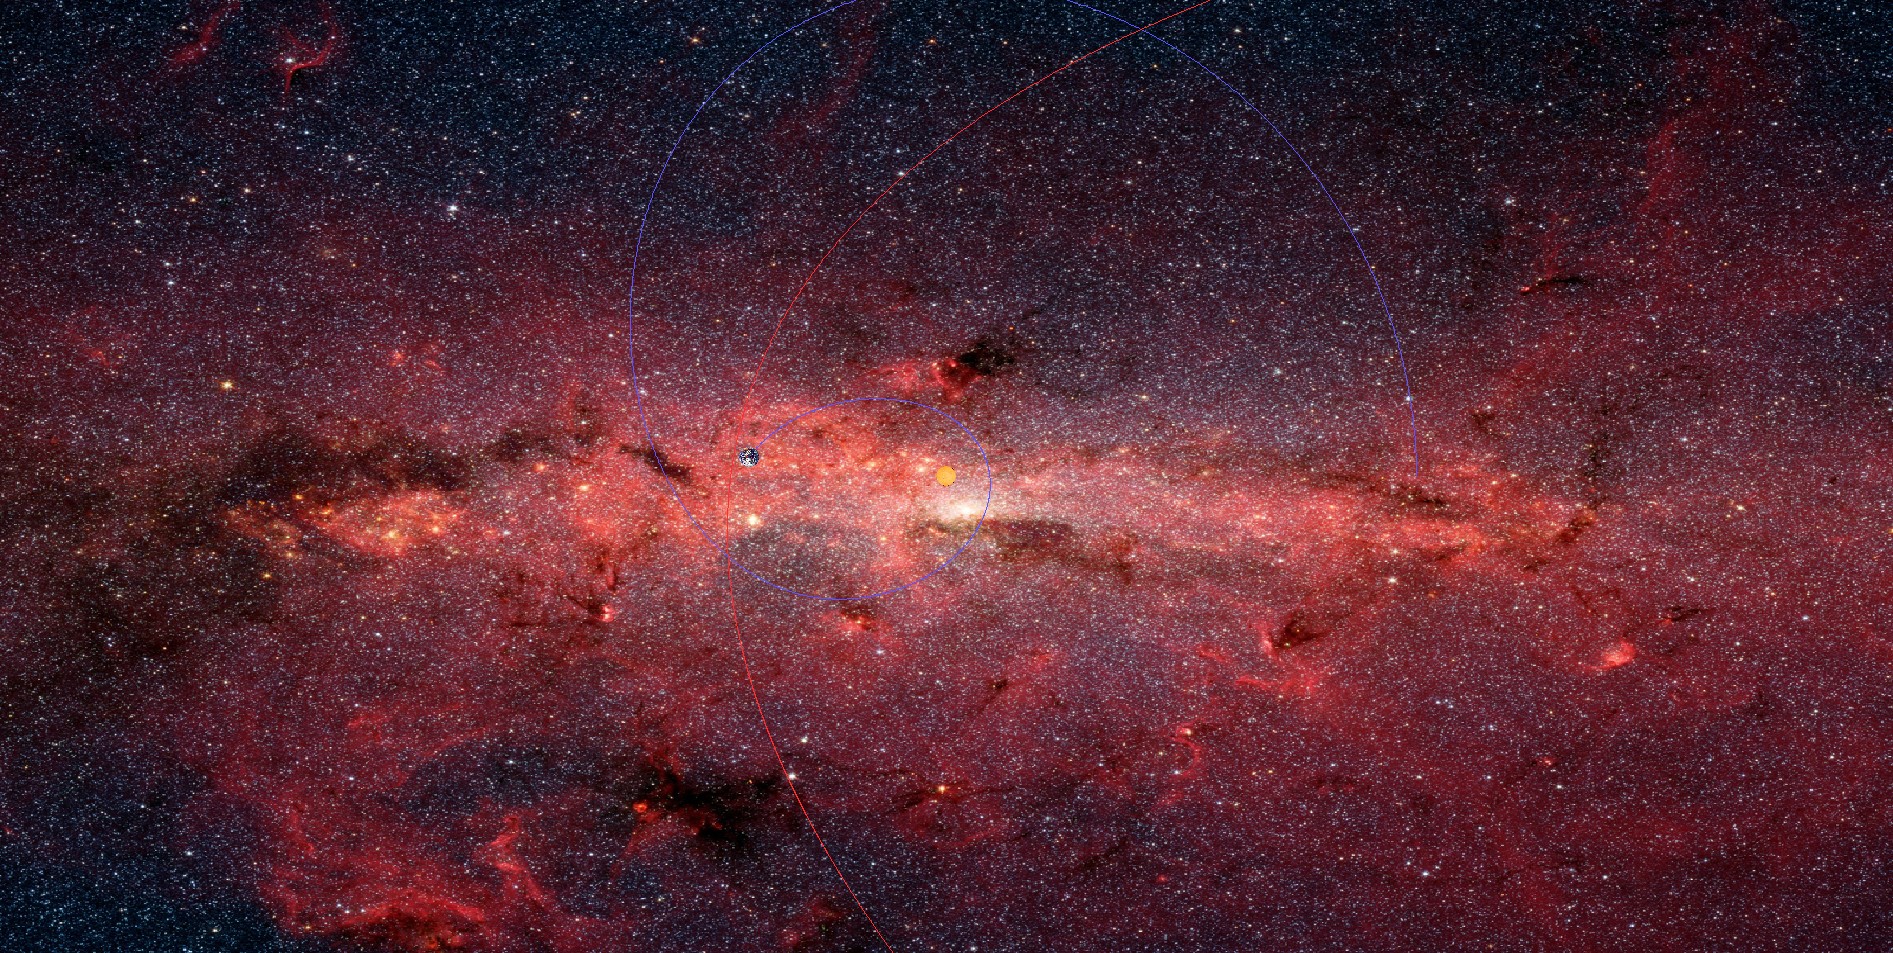
The final example is from my Exodus series, which has been called by some readers as a new level of worldbuilding.  I won’t even go into the central black hole with eight stars in orbit around it, all with their own system.  One of the systems I wanted as accurate as possible was the two Earth mass planets in orbits around each other, the capital world and it’s twin.  Both were habitable, and I also wanted the capital planet to have a terraformed moon in orbit.  So I modeled the two planets in orbit around each other first off, with the one parameter being that the day night cycle on both worlds would not be longer than about forty hours.  Anything longer might cause problems with the earth like vegetation on the worlds.  That was easy enough.  I had two beautiful planets that each had a bright world in the sky in one hemisphere at night, and experienced daily short lived eclipses on their day sides each light cycle.  The worlds were about ninety thousand kilometers or so apart, which would make each world many times larger than our moon in the sky of the other.  I then added the moon, and found that it would orbit the one world at about ten thousand kilometers in a slightly elliptical orbit.  I ran the simulation about a thousand cycles, and everything seemed to hold together.

One of the coolest things about a science fiction setting is how different we can make them.  Planets in orbit with each other around a center of gravity, moons in orbit around larger planets.  Multiple star systems.  One of the coolest things I found about Orbit Xplorer was how it sparked the imagination, suggesting setting I wouldn’t have otherwise thought of.  Setting can be another major character in your work, the more imaginative, the better.

Guest Writer Bio:
Doug Dandridge
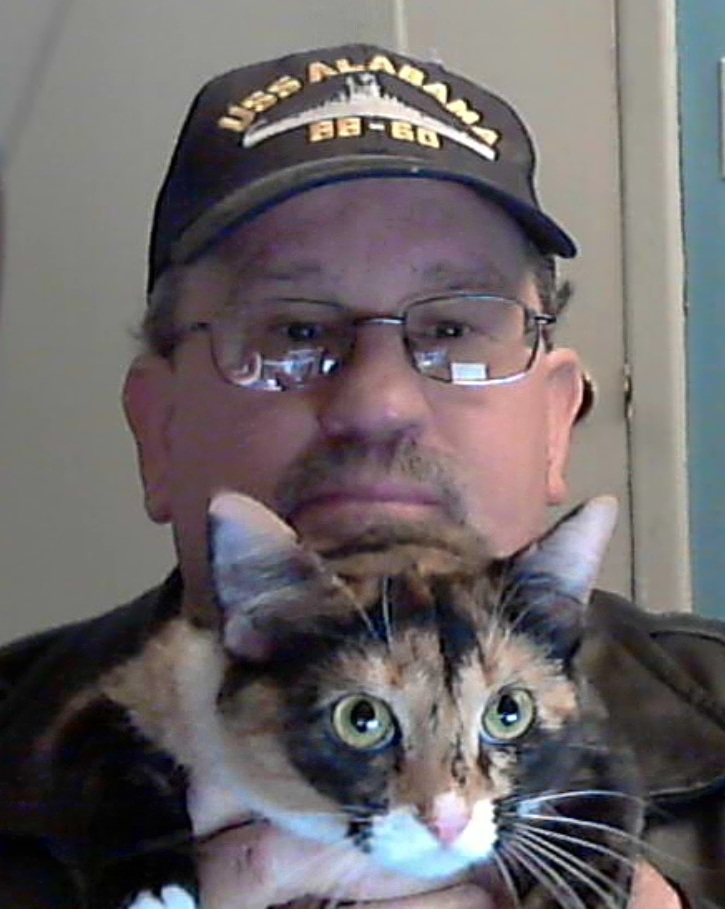
Doug Dandridge lives in Tallahassee, Florida, where he has worked as a full time writer since March of 2013. A graduate of Florida State University and the University of Alabama, and a veteran of the United States Army, Doug has been in love with the fantastic since an early age.  He has over twenty-five self published books on Amazon, and has a half dozen novels that have reached the top five in Space Opera in the US and UK.

Making a Multi-Use Banner

A guest post by Tim Reynolds.

Most writers I know are on a limited budget for advertising and promotion, especially the self-published ones. Even the writers with traditional publishers may have to foot the bill for some or all promotional supplies.

I, myself, am both self-published (4 books) and traditionally published. When I’ve done book signings in the past I had some nicely done 8×10 covers in frames on the table, with teasers about the book and even reviews. It looked well and good and…cheesy. At multiple-author events, the authors who got the most attention (and often the most sales) had a LARGE presence in the form of a banner.

Banners are great for signings, readings, and trade shows. The problem is that many authors have multiple books they need to promote, though seldom all at the same time. They might have a signing for their YA novel tomorrow, then a reading for their sci-fi opus on Sunday, and have a table set up at World Fantasy Convention next week. You want your banner to promote your product, but that’s three products, which makes for three banners. Banners aren’t cheap. The stands can be reused, but a banner for each book gets prohibitively expensive.

My solution? An adaptable, multi-use banner.

STEP ONE: Design a banner that covers as many of your bases as possible, without using any specific titles. This is the hardest step. Many of you will want to get your banner professionally designed. I have a background in graphics, so I did my own.

Tim Banner
My author banner. 30″ x 72″

Here’s mine. It’s 30″ x 72″. I’ve cropped off the bottom because it’s not important right now. If you can’t read what it says, here it is:

“Timothy Reynolds. Spinner of Tales, Fabricator of Fictions, Twister of History. ‘Canada’s Modern-Day Aesop’ ~ Barbara Budd, CBC Radio.

That’s my namea catchy/cute way of saying what I do, and the best promo quote I have. It also has my author photo, a moon with a bloody screaming face, and a generic city scape at night…to add atmosphere. Much of what I write has a dark element to it, so this is not a light and fluffy smiles-and-puppies banner.

There’s no publisher name at all. Not even my own company. Why? Because if I put Cometcatcher Press on it, then I can’t use it when I’m promoting “When Anastasia Laughs”, which will be published by Tyche Books in 2016, or “Tesseracts Seventeen” from Edge Science Fiction & Fantasy Publishing, which contains my short story “Why Pete?”.

Tim Foamcoare
Covers as photographs, mounted on foam core and laminated

STEP TWO: Have your cover(s) reproduced as photographs, mounted on foam core and laminated for protection. Almost every film lab can do this for you. I use Western Canada’s best: London Drugs.

I had all four covers done as 5x7s. Why? Because 5x7s are lighter than 8x10s and will remain in place better.

Magnetic Tape
Magnetic Tape

STEP THREE: You will need magnetic tape. It’s available at Michael’s Arts & Crafts and 10′ costs less than $5. Cuttwo 5″ strips for each cover. Because the strips will maintain their shape from when they were on the roll, take the strips and place them on a flat surface, under a heavy weight, overnight. Once they are flat, they are ready to use.

Cover and magnets
A cover and the magnetic Strips

STEP FOUR: Working on a clean surface, place a cover face down. Peel the backing off of the magnetic tape, and place two strips firmly on the back of the cover, centred left-to-right and down a bit from the top.

Peeling magnet paper
Peeling magnet paper off

Place the magnetic tape on the back of the cover. Press firmly.

Magnet back of cover
Place the magnetic tape on the back of the cover. Press firmly.


STEP FIVE: While the banner is hanging, place the cover where you want it to be, then place the second magnetic strip on the back of the banner, directly opposite the strip on the cover.

Back of banner
Magnetic strips in place on the back of the banner, holding the cover in place.

When it’s all done, you have a banner with one (or in this case, two) covers on display. You can do the same with the publisher’s logo and even a sign with the times you will be present. Other possibilities include: “Coming Soon”, “New York Times Bestseller”, or whatever your heart desires. Reviews, quotes, anything. All I suggest is to not overload the banner.

Covers on Banner
Two light-weight but sturdy covers magnetically attached to a banner.

The foam core is very light weight, as is the magnetic tape. I had considered using adhesive Velcro, but then the banner couldn’t be rolled up smoothly. This method with the magnets allows complete removal of the artwork and for the banner to be rolled and stored indefinitely without damage being done to its surface or shape. For a stronger attachment, put magnetic tape near the bottom of the cover as well.

(NOTE: I’m still not sold on the white borders I put on the covers, but with a sharp blade I can remove them easily.)

STEP SIX: Get yourself a 6×8 Rubbermaid lunch box for storing the covers, a hard plastic tube for the banner, and you’re all set for your next signing.

MATERIALS: Magnetic Tape: $5. Banner on heavy outdoor vinyl: $63 &Stand (includes carrying bag): $40 (both from Vistaprint), Plastic banner tube $21 from a local Digital Post store. BTW, VistaPrint is always having sales, so set up an account, do the design work, and wait. They will send you an email shortly with the latest sale. You can save anywhere from $10 to 33% of your entire order. Their online design & preview kicks ass, too.

Note: in some of the photos above you can see what look like creases on the banner. It was damaged in shipping. I called VistaPrint and explained the situation. Without seeing photos or getting witness statements, they immediately ordered a new one and it was shipped out the next day. It arrived in three days. Their customer service is second-to-none.

I hope this gives you some ideas and inspires you to get out there and promote your writing with a professional presence. Other things to help are bookmarks with the cover, where to buy it, and your website URL. If you don’t have your own website…GET ONE!

That’s it, that’s all.

Ciao for now,

Tim.

Tim ReynoldsTim Reynolds is a Canadian ‘Twistorian’, bending and twisting history into fictional shapes for fun & entertainment.

His debut novel, the urban fantasy, The Broken Shield, was released on July 21, 2014 on Amazon as a digital book and in March 2015 in paperback form. It covers over 2000 years of history and shows that even Lucifer knows “there’s an app for that”. His published short stories range from lighthearted fantasy to turn-on-the-damned-lights-now horror. His 100-word story “Temper Temper” was a winner of Kobo Writing Life’s Jeffrey Archer Short Story Challenge. In 2016 watch for his novel “When Anastasia Laughs” from Tyche Books.

He can be found online at www.tgmreynolds.com or @TGMReynolds on Twitter.

Using Skype and Google Docs in Writers Groups

A guest post by Ryan English.

The best kind of writers groups are the ones that can meet in person, but there any number of reasons why that might not be something you can pull off. Perhaps members keep moving; perhaps it’s simply a hassle to put pants on and leave the apartment. Fortunately, there are pantsless options.

My writers group has been using the following for at least four years, perhaps longer. We started out a few years before that as a group that met in person, often at the Barnes and Noble, and that was going splendidly until people started moving away. We found that being able to verbally discuss each submission as a group led to a real improvements in our skill. We got a better feel for what worked and what didn’t because we were able to sit there and have a conversation about it. When it started to become impossible to meet in person, we needed something that replicated that dynamic.

We needed two things: to be able to have a verbal conversation, and we needed to be able to easily distribute and view texts. We use Skype because it has superior call quality. We’ve tried Hangouts a few times over the years and it just doesn’t cut it for us. Some of our members have bad internet connections and Skype seems better able to handle it. Hangouts is worth trying, though, because it is integrated right into Google Drive, so you won’t need two windows open. One other advantage Hangouts had was that group video calls were free, but Skype recently made it free as well.

For the texts, we use Google Drive because it is truly the ideal platform. Honestly, even if you’re meeting in person, the features you get in Google Drive are such that I would recommend everyone bring a tablet or small laptop instead of a printed page. It works like this: Whoever’s in charge or has been there the longest creates a shared folder for the writers group. Name it something obvious. Then invite each member of the group to share the folder. Make sure that when you add them, it says “can edit” on the permissions. For each meeting, create a new folder inside that one for submissions. Name it by the date of the meeting.

Then it’s time to submit and read each other’s writing. This is important: make sure that your members aren’t just dropping in a Word file—they need to be in the right folder, hit New, select Google Doc, and copy and paste their writing. Once it’s saved in a shared folder as a Google Doc, the entire group will be able to read it and comment. If it’s a Word document, several features will be missing.

When it’s time to meet, everyone opens the same document and can enjoy real-time collaboration. Each member viewing the document has a uniquely-colored cursor, and you can see where everyone is on the page. If one person highlights a paragraph, the entire group can see it immediately, which is tremendously useful for pointing things out. For example, I might say, “This sentence right here is weird…” and I wouldn’t have to explain where to find it—it’s highlighted. Just scroll down.

The second benefit to using Google Docs is the comment feature. Highlight a passage, right click, and hit comment. This works like it does in Word—a box is created on the side of the page that contains your comments. Everyone can see these, which means that six people won’t need to point out the same typo. I find that this is an excellent way to take notes during a meeting, as well; if I want to remember something, I highlight a word and leave myself a good comment about it to go back and read later.

Google will email you whenever a comment is left on a doc, which lets you know that someone reviewed your submission. This can get a bit spammy, but it hasn’t been a problem. It can be nice to know that someone who wasn’t able to make it to a meeting was still able to leave comments.

There’s another benefit to working online. Anyone familiar with writers groups knows that members come and go. People join, stick around for a year, and lose interest or move on. If your group is tied to a geographical location, replacing members is going to get harder and harder every year. But if you meet online, anyone in the world could conceivably be recruited. Also, it gets a lot harder to justify missing a meeting if you don’t even have to put on pants to attend, and consistently is the lifeblood of any writers group. I can’t recommend this method highly enough.

Ryan EnglishGuest Writer Bio:
Ryan English writes speculative fiction in ancient and classical world settings. He recently achieved his Masters in Political Science but works in IT because it pays the bills. He plays a number of instruments ranging from piano to didgeridoo to shakuhachi and studied Shaolin Kung-fu for eight years. He lives in Utah, where he can often be found hiking barefoot.

An Image is Worth . . . A LOT

Picture worth 1000 wordsThey say an image is worth a thousand words, but is it worth all the hassle to find a good one?  Once we find one, can we legally use it?  Do we bother to find out?

We should.

Images are everywhere, and a blog post without an image is like spaghetti without the sauce.  It’s edible, but who’s going to want to try it?  This is the age of the internet, of micro attention spans and too much competition from pictures of cats and babies on Facebook.

So yes, we need images for blogs, for articles, for social interactions, and often for covers.  There are tons of great images on the internet, but finding a fun image, although sometimes a hassle, is just the start.

Can we take any image we find on Google and slap it onto our blog, article, or cover?

Not necessarily.

There are many who would say, “Everybody’s doing it.  No one’s going to care if I ‘borrow’ this cool image and use it.  Even if they notice, they’ll be happy about it – free advertising.”  Etc.

Those arguments can be persuasive, but they’re also false.  There are ways to do reverse image searches and identify everyone who’s using your image.  Sites like TinEye make this very easy.

The more I think about it, the more I realize it’s the principle even more than the fear of potentially getting ‘caught’ that should drive our decisions about the proper use of photos.  I don’t want people stealing my words, so why would I steal someone else’s image?

So what do we do?

Actually there are lots of options, so no one should feel obliged to take an image that they may not actually have rights to use.  Here are some suggestions.

  1. Frank in WoodsUse your own photo.

Sounds almost too easy, but why not?  In today’s world, everyone’s got a phone or three handy and most of those have cameras.  If you’re like me and you’re not a professional photographer, who cares?  If you see a pose or an idea that you like, there’s no reason you can’t go set up a similar photo of your own.  Someone else owns their photo online, but they don’t own the ‘idea’ of a photo.  It’s remarkably simple to stage your own photo for use.  I’ve done it quite a few times with excellent results.

Chess
A photo I took as part of a blog post.
  1. Ask permission.

This can take longer, but if you find a photo you like, feel free to contact the person who owns it if they have a web site or link.  They might just say yes.

  1. Modify your search criteria.

You can actually find great photos on Google that are available for use.  Most photos you find through the general search don’t clearly state if they are, but simple modifications to your search criteria can limit your search to those photos flagged as reusable.

  • On the Google page, click the “Search Tools” button
  • In the new toolbar that appears below that, click “Usage rights”
  • Select “Labeled for reuse”.

Google search tip

You will notice often that the list of photos returned is not as extensive as the wide-open search, but sometimes you can find some cool gems.  It’s worth a try because it’s fast and it’s free.

  1. More on search modifications

Another major image site is Flickr.  Again, you can click on the “All license” drop-down, which is the default search and select “All Creative Commons”.

Flickr search tip

  • When you find an image you like, click on it and look for the rights declaration. Quite often it will say “Some rights reserved.”  If you click on that, you can see what rights can be granted.  Quite often it will allow you to use the photo for free for non-commercial use (ie – blog post) as long as you give the photographer credit and link back to their site/image from the copy you use.
  1. Free image sites.

There are a lot of these.  In seconds, I did a Google search and found listings and listings of sites containing free images.  Some are pretty basic, but some have a lot of images and might be worth a look.  Depending on what type of images you’re looking for, and with a little investment of time, you can develop a listing of your favorite go-to sites.

  1. Paid options

For some of the best images, you might just have to pay for them, although that doesn’t mean you have to pay much.

  • Saving FaceMy favorite site is Dollar Photo Club. Great high-res photos for $1.  They have a huge selection and I’ve found some incredible images there.  Using pieces of several photos from Dollar Photo, combined with some mad photoshopping skills, one of my cover artists designed this excellent cover for Saving Face and also the cover for the soon-to-be-released Memory Hunter.  I got killer covers for a very reasonable fee.

I’ve also used Dollar Photo to grab images for my blog and to design simple covers for short stories I posted on Wattpad.

  • Istockphoto is a well-known site where you can find royalty free images, but often you pay up to $12 per image. That’s a bit pricey for my wallet, unless it’s for a cover or other high-value use.
  • Deposit Photos is a site I haven’t used, and it also uses a subscription model like other pay photo sites, but if you use a lot of images, you can get a plan that drops the price to $0.33 per image.
  • ShutterStock is another well-known image site where you have to pay about $10 or so for most images. If you’re looking for a high-quality image to include in a book cover, it might be worth it.
  • You might also try a place like Fiverr where you can get a lot of creative work done cheap. As always, verify the source of any images you get.

There are lots of other image sites out there.  I barely scratched the surface.  The bottom line is, know what license restrictions your image brings with it and stay on the right side of the question.  It’s not worth the hassle (and likely cost) associated with misusing someone else’s property.

Where do you get your images?